|
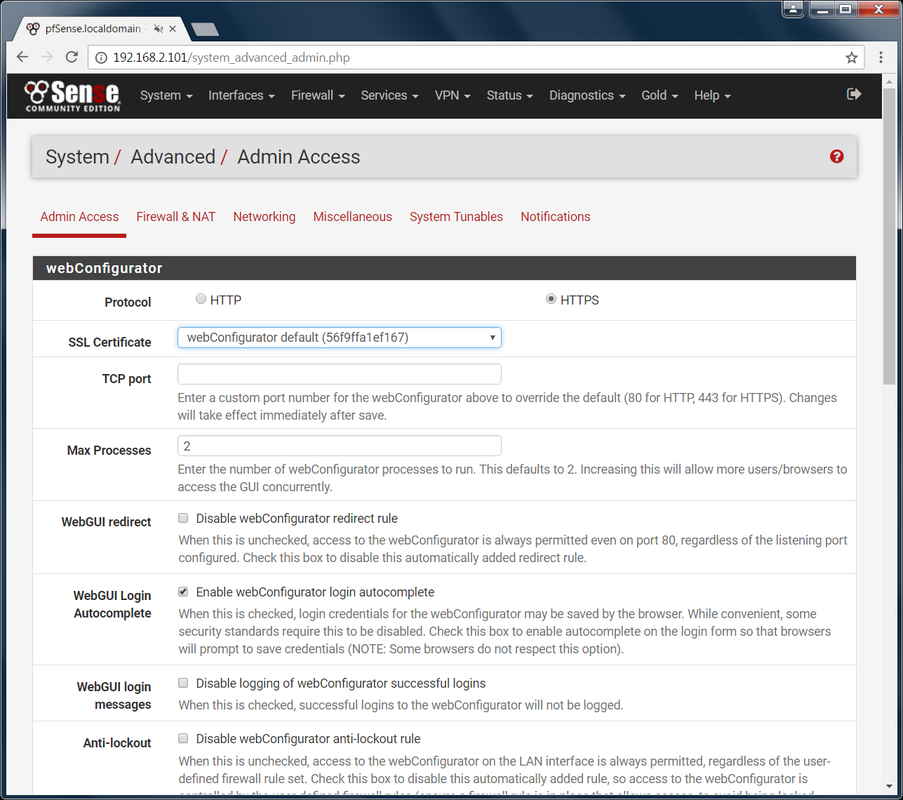
Hello pfSense n00bs! I am back with part 3 where I will show you the basics of allowing and blocking websites through your newly created (*cough* ~1 year old) pfSense server. Part 1 | Part 2 | [ Part 3 ] First of all, this is a continuation of Parts 1 and 2. I have changed the title because the backend stuff we did in those posts is no longer relevant to what we will be doing from now on. Also, that title was way too long. Let's (finally) start configuring our pfSense server! Logging In: Login to the webgui via a computer connected on the LAN i.e. connected to pfSense. If you forgot the IP address of your pfSense computer, look at the "LAN" ip address shown in the Main menu of your pfSense Server. The default login credentials are: admin/pfsense On your first login, it will try to make you go through a wizard. Just skip this part and go to Status -> Dashboard. Here you will find various details about the current running status of your server. It is basically a quick overview to let you know you if resources are running low. I may make another part about this later on. Basic System Security Setup: Like any OOTB system, the default security settings are usually garbage. They make things this way so nothing gets in your way when first using it and also...consulting/training... Let's go ahead and make some basic changes to beef up the security of your new server. Convert to HTTPS: In case you have been living under a rock, HTTPS is the new HTTP. You should enable it whenever possible especially when you are transferring sensitive data to the user i.e. webgui settings are sensitive data. Let's turn this on.
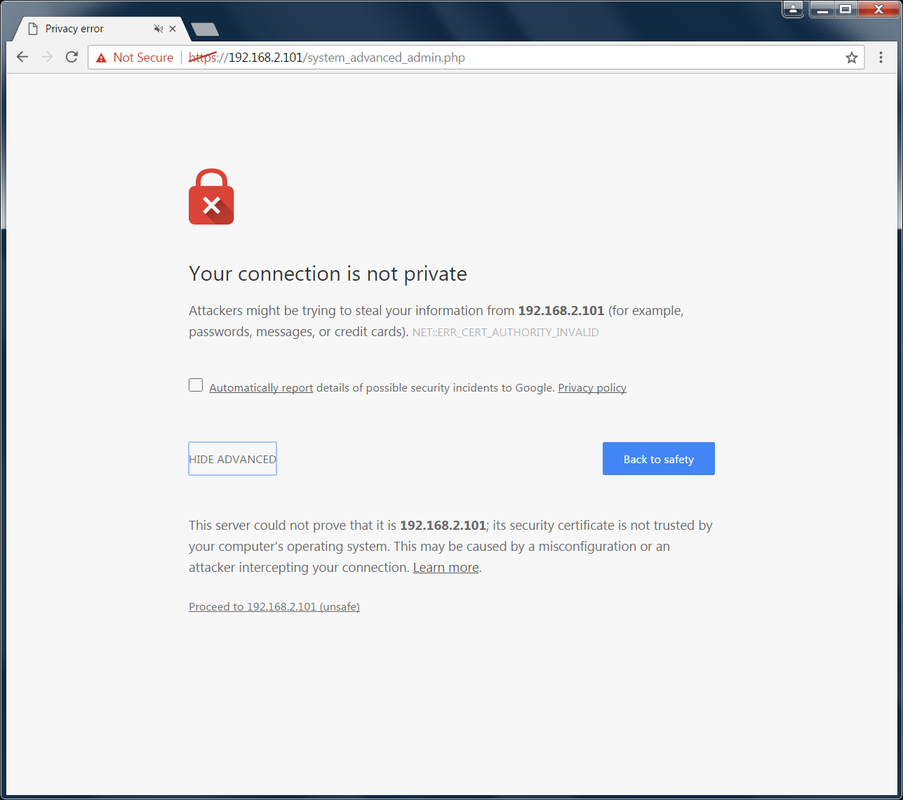
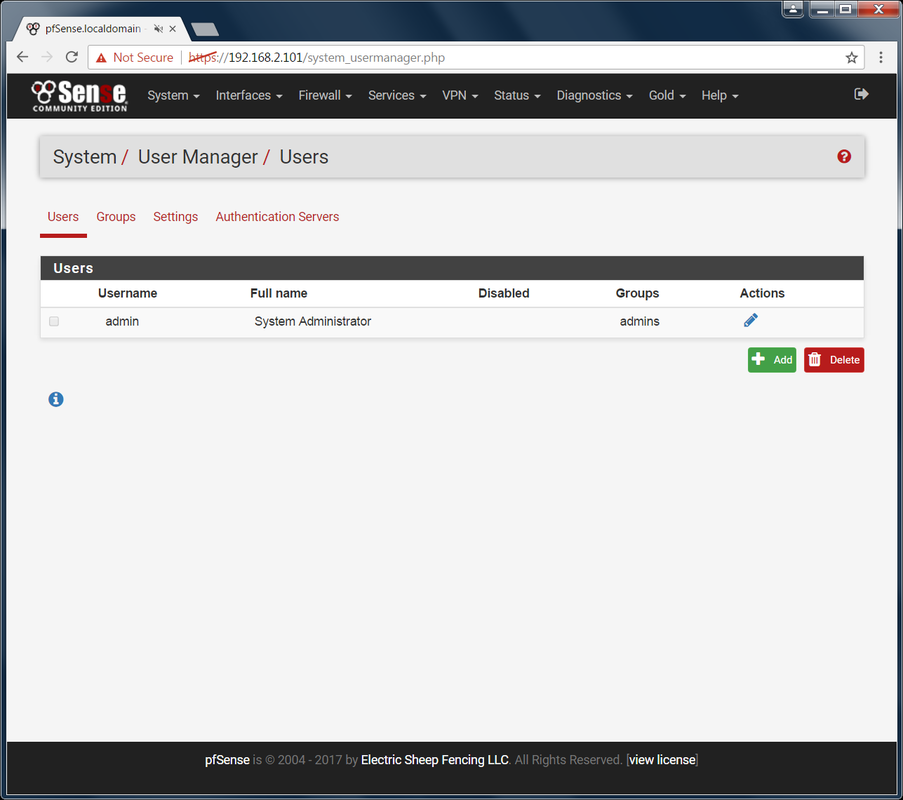
You can either wait for it to redirect you to the HTTPS URL or you can go there yourself. You will see a certificate error by default. This is okay, just click the Advanced -> proceed link at the bottom. You will be asked to re-login. Feel free to add this site as an exception to prevent this certificate issue from showing up or you can always go the extra mile and setup a real certificate. Change Admin Password and Disable Default Admin Account: I hope you have noticed that there are an awful lot of widgets and things out there that have an admin user with the name "admin". As nice this is when you are first setting thing up, it also leave you vulnerable and you should really disable and make a new user. The default password is also simple and should be changed no matter what. Go to System -> User Manager -> Users There is currently only one user in the system which is the default admin user. You'll notice that you cannot delete this user. You also can't change the username. There are two paths you can take here.
Be careful of the order of which you do things. You don't want to be disabling the default account before you made the other one. It is easy to make this mistake. I am going to go with path 2 because it will give me a chance to show you more screenshots and it is the better option.
Once you have confirmed that you can login with the new admin user, let's use that account to deal with the default admin.
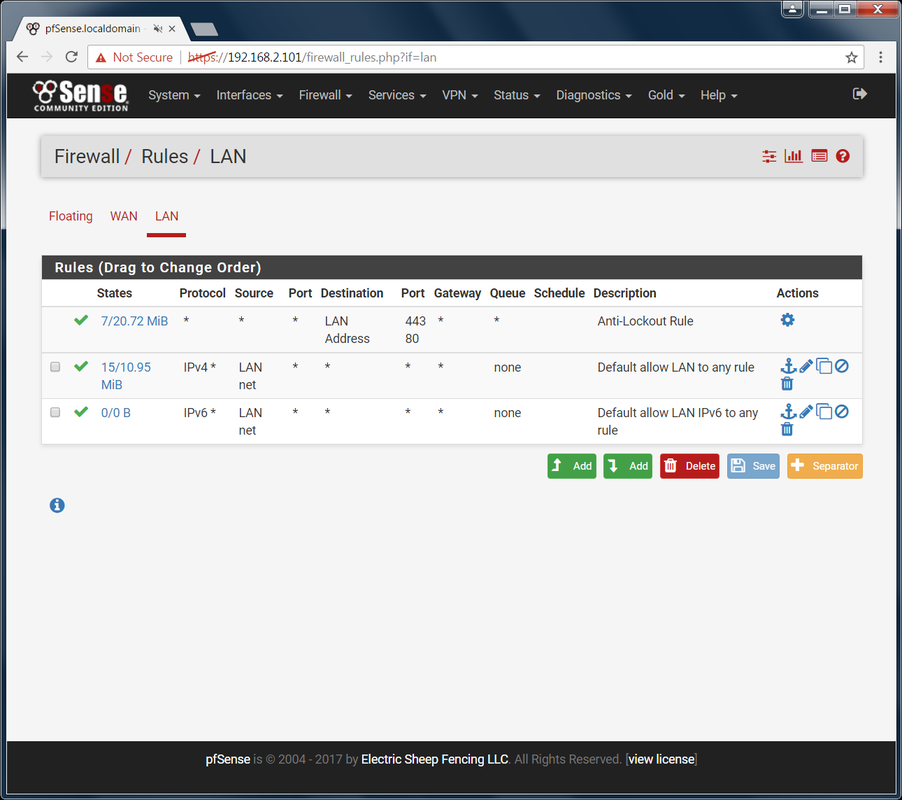
Back on the Users screen, you should now see an asterisk in the disabled column for the default admin account. Try logging in with it. Good. That user can no longer login. That is as far as I am going to take thing on the system security side. Let's dive into controlling web access. Basic Firewall Setup: It is time to start making changing that affect the actual users. This is the fun part as you get to test and see whether your changes are working. Close the Floodgate: Go to Firewall -> Rules -> LAN There are 3 OOTB rules setup for you. The first one is to prevent you from blocking access to the webgui. You'll notice it has no option to be deleted. We won't touch this one. The next two leave the floodgates wide open to web traffic. Anything and everything can get through your firewall right now! Block it.
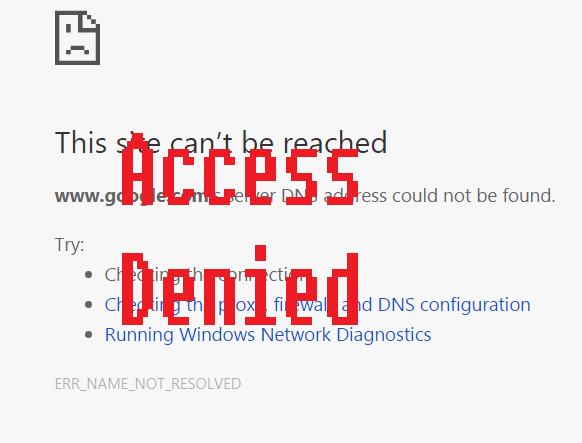
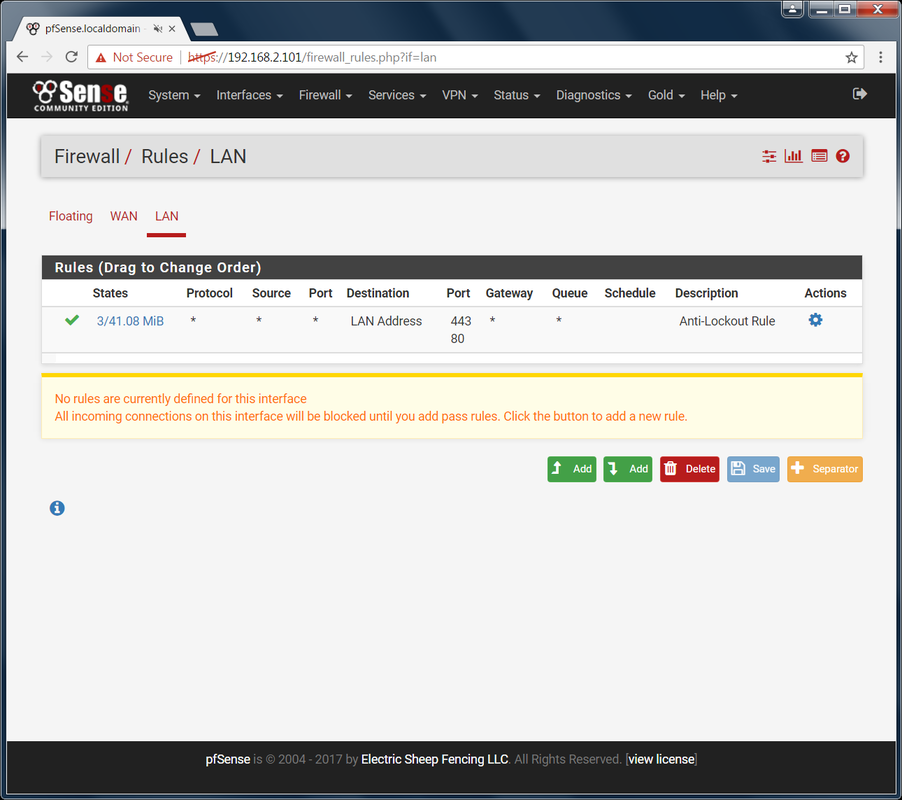
We get sad face! Perfect. Nothing can get in or out. Blocking and Allowing Web Traffic: It is time to start thinking about how much effort you are willing to put into this firewall and how strict you want to be. You basically have two options:
I am going to show you a little of everything here so you know how it works but don't take this example of exactly what you should do. It is only an example of what you can do and how to do it. The basic steps are:
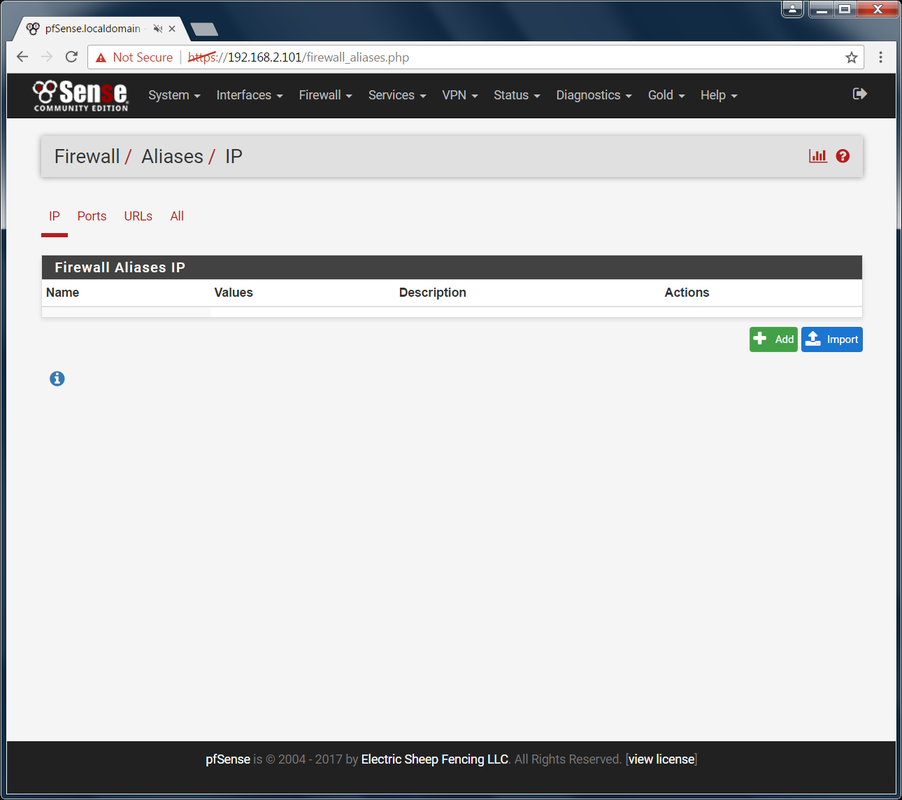
Creating a New Alias: Let's start off with allowing a single site through in our now super restricted environment. Go to Firewall - Aliases -> IP Here, you will put all IP addresses and fully qualified hostnames of websites you want to allow or block access to.
Now we need to use this alias to setup the actual rule that will allow or prevent access. Configuring Firewall Rule for Alias: Before we go any further, we need to talk about how web traffic works. When you type in the URL of a website, that URL is not the actual server name (it better not be anyways). You are still able to get to the server that is hosting the website. How is that? Through a DNS server. Your web requests are routed to a DNS server which then searches its list to find a match. If one is found, it then automatically routes you to the right IP address which is where the web content is served. So when I type www.google.com in my address bar, a DNS server then resolves that URL to an IP address for me. Without a DNS server, you would need to know the exact IP address to type in. How would you like to type in 73.9.3.1 every time you wanted to see how last year's NBA Finals went? It would not be fun, well it would be but still, you get the point. We can't just allow access to our website by making a rule for it. We need to allow access to a DNS server first. There are various DNS servers all over the world. I imagine the dark web has it's own. For regular folk like you and I, we usually go through our Internet provider's DNS Servers or Google's DNS servers even if we don't realize it. Google has two main public DNS servers (8.8.8.8 and 8.8.4.4). If you don't believe me, then google it. I am going to setup the IPv4 DNS servers. Although there are some for IPv6, I don't think you will be needing this for a while.
Finally, we can start giving the people access to the web! Allowing a Website Through:
It appears to not work but the issue isn't our rule. I mentioned that you may be using Google's Public DNS servers without even knowing it. If IT configured your network to use Google DNS servers then you shouldn't be having this issue. You get this when you are pointing to your Internet providers DNS servers. This is the default setup for every internet user out there. The three options are:
On the user's computer:
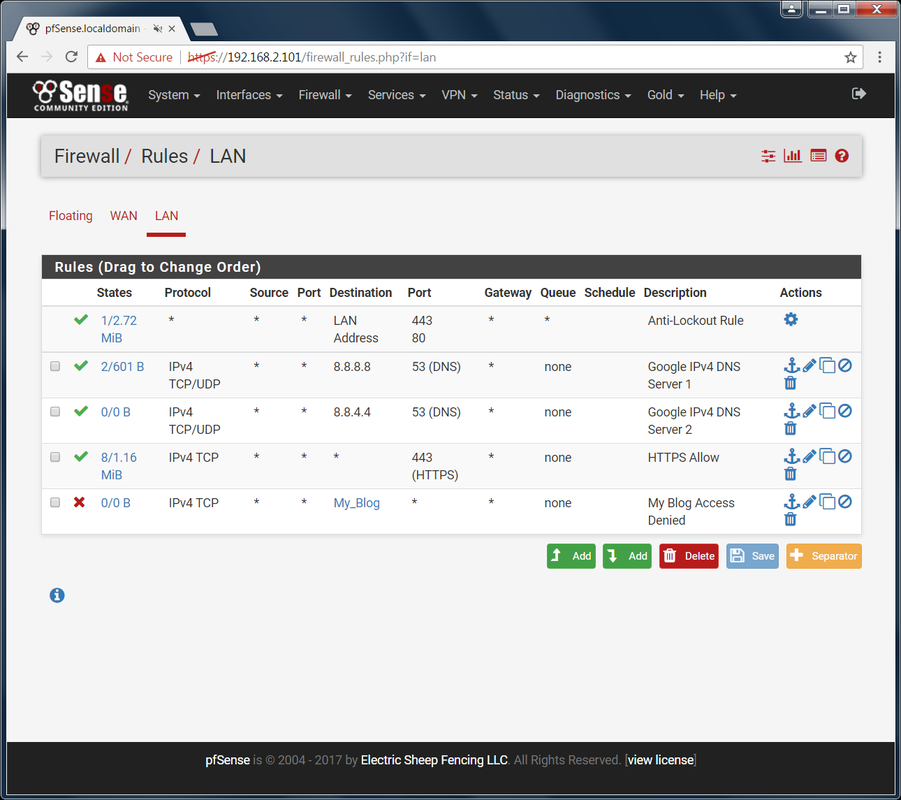
<A long time has passed> Oh no! What happened to my site? One of the many issues you will encounter with a restrictive environment is that many websites rely on scripts that are hosted on different sites. There is no easy way to simply find and allow. You can dig through the firewall logs or the web code but it is probably not worth it. I am sure some of you more capable people can find ways to auto-allow based on if an allowed site is asking for it but I do not know how to do that so I will leave it there. Anyways, that is how you allow a site. To block, simply edit the rule or add a new one and change the Action drop own from Pass to Block. I would also change the Destination port range to any instead of just HTTP or HTTPS just to be sure no hidden website gets through on that URL. Now that you have learned you lesson with a very restrictive environment, I recommend you simply create a rule to allow all web traffic that is HTTPS. Yes, you will still encounter issues with scripts being hosted on non-HTTPS sites but that should be few and far between at this point. See below for the example setup for such an environment that blocks a single website. Note: If you allow only HTTPS like above, users will have to explicitly append https:// to the beginning of every site they want to go to. This is because web servers by default take you to HTTP and then reroute you to HTTPS. There is no way to fix this on your end.
That's all for Part 3! I hope you have learned something new and that I got to you before you paid someone to teach you this... I will post another part in the future. Stay tuned.
7 Comments
invisible_guest
9/3/2017 06:34:55 am
hello and thanks for advice. i just did as you described, but it did not work. checked every single point 10x again and again, still not working.
Reply
Norman Pervis
8/8/2018 08:21:36 am
Appreciate the great information you posting here. It's helping me to learn the PFSennse Firewall I inherited with my new job.
Reply
Vishant kamboj
2/11/2019 03:09:44 am
google stop working automatically some time(pfsense-2.4.4)
Reply
1/18/2023 05:13:35 am
Excellent article! Thank you for your excellent post, and I look forward to the next one. If you're seeking for discount codes and offers, go to couponplusdeals.com.
Reply
12/13/2023 11:25:14 pm
Grateful for you writing this
Reply
Your comment will be posted after it is approved.
Leave a Reply. |
AuthorErick Johnson Archives
May 2024
Categories
All
|
 RSS Feed