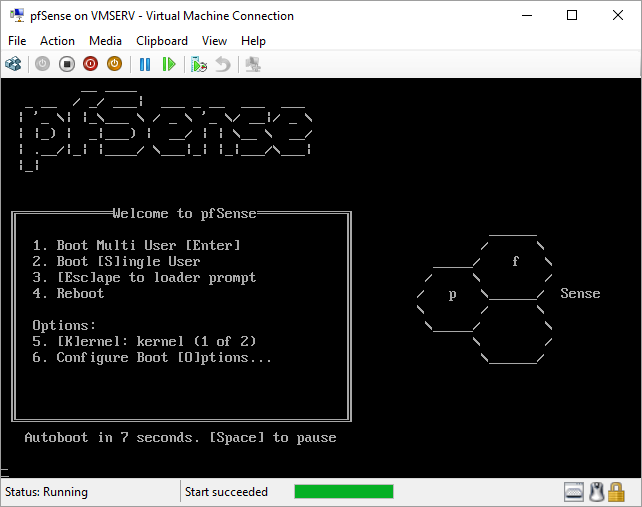
 After using PeerBlock for so many years, I wanted to see about providing a PeerBlock type solution to my entire network. Before investing money in a physical system, I decided to try pfSense in a virtual environment to see if it would fit my needs. This "How To" guide walks you through the install and configuration steps along with solutions to any challenges I faced. [ Part 1 ] | Part 2 | Part 3 HardwareFor this guide, I used my latest 2016 Computer. Please refer to that post for the complete specs. I also connected a switch from what will be my LAN (secondary NIC) so that multiple clients can connect to the LAN behind the firewall. The basic diagram is: Internet -> Router -> VM Host (WAN) -> VM Host (LAN) -> Switch -> Client SoftwareDownload the latest Beta build of pfsense. You will see why you should get the Beta build later on. The latest released version as of this writing is 2.2.6 and the latest Beta is 2.3. It can be difficult to find which ISO to get so I have included screenshots to help you out. (Note that the ISO called “latest” is simply a copy of the latest dated snapshot. This is probably done for some quick web link download somewhere on the site so they don’t have to keep updating said link.)  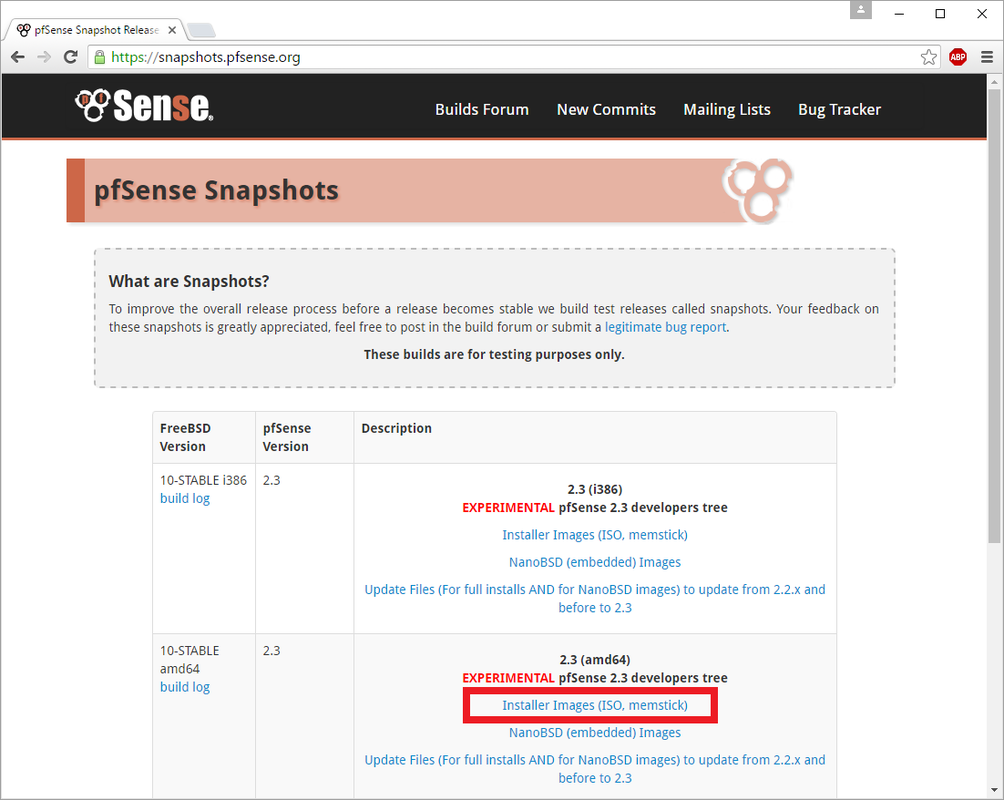 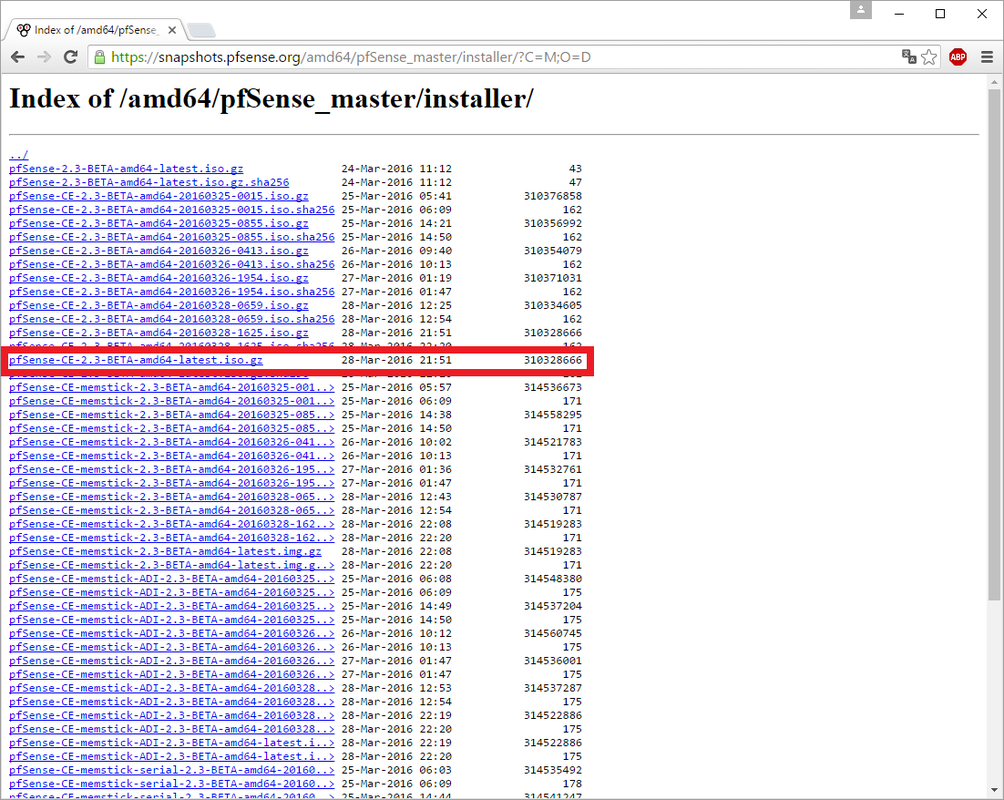 Setting Up Hyper-VThe first thing you need to do is to give Hyper-V access to the 2nd network card by creating a Virtual Switch. Option A: Right click on server in left pane -> Virtual Switch Manager Option B: With server selected in left pane -> Action -> Virtual Switch Manager 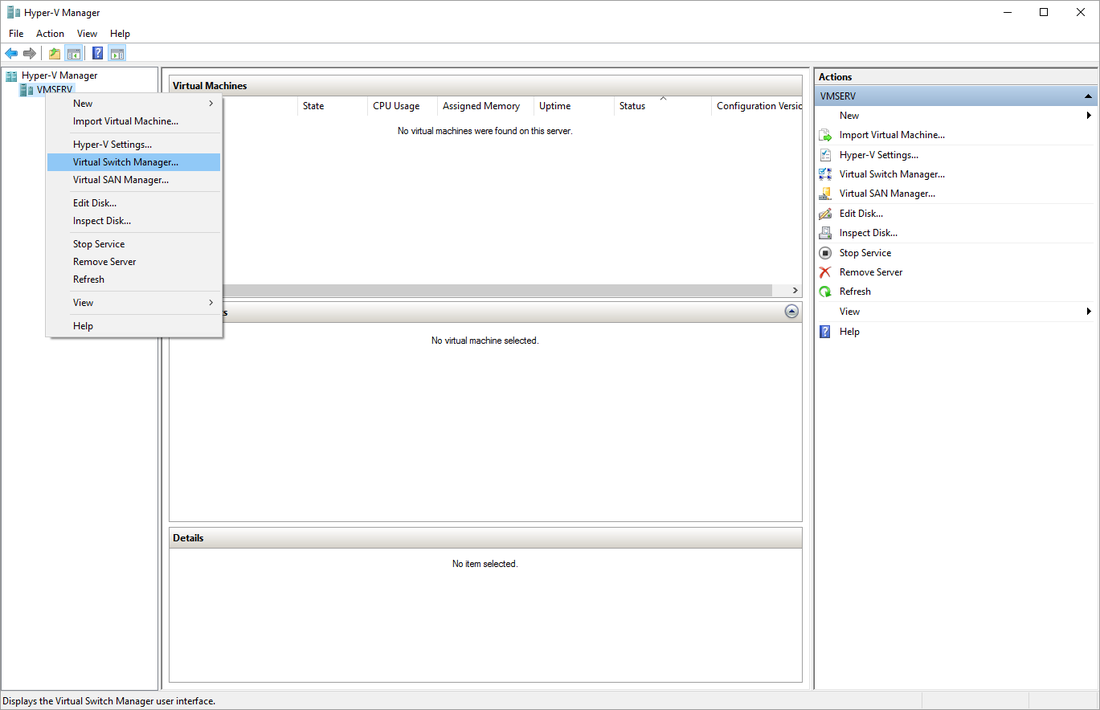 Depending on when you installed Hyper-V in relation to the extra NIC, you should already see at least one virtual switch there that was setup on install. In this case, the Ethernet connection from my motherboard is listed. I added a second PCIE NIC after I installed Hyper-V so I need to create a new virtual switch and link it to that one. Select New virtual network switch -> Select External -> Create Virtual Switch -> Select new NIC card in the Connection type section 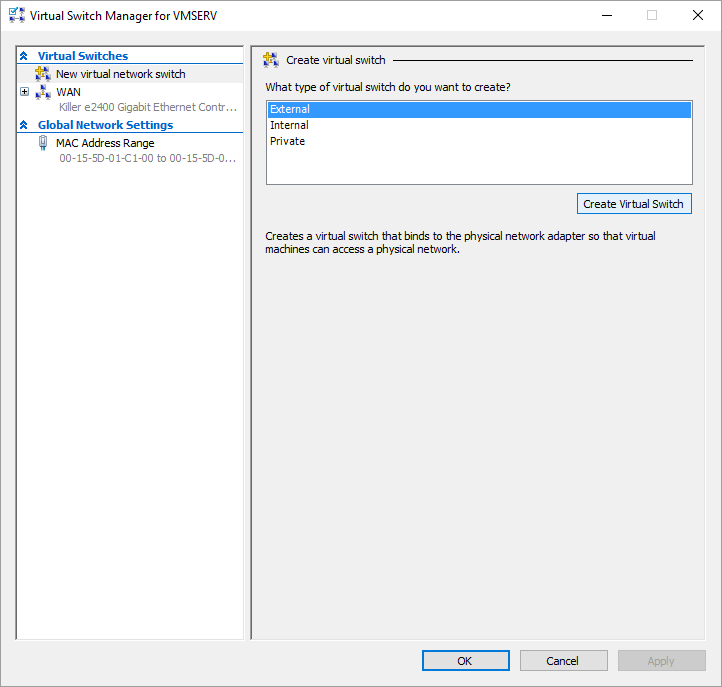 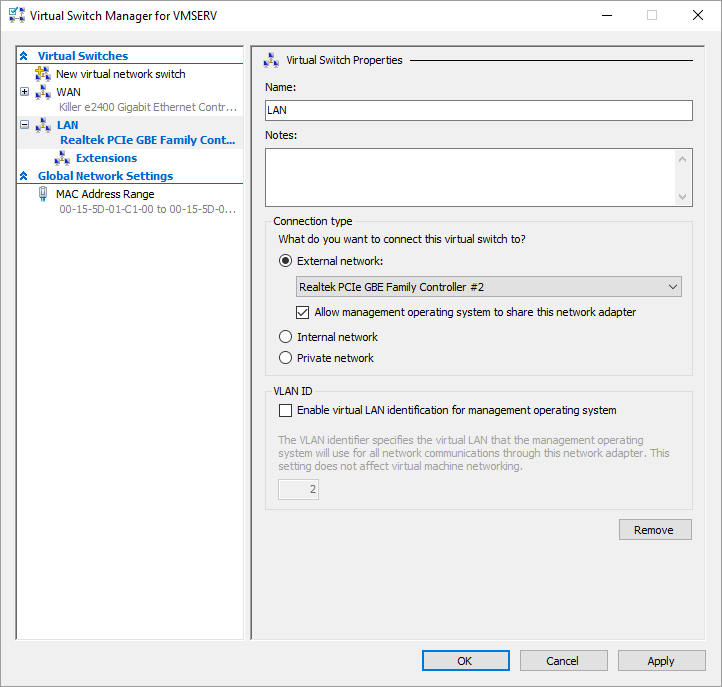 Note: For illustrative purposes, I have labeled my switches as WAN and LAN. WAN is where I get the internet or inbound traffic from and LAN is where that inbound traffic is going to after it passes through the firewall. LAN is the local area network behind the firewall. Security Tip: It is highly recommended to invest the money in having at least 3 separate NICs for my setup. One for WAN, one for LAN, and one to use for management purposes only for Hyper-V. Since I am in a test environment, I will leave both as is with “Allow management operating system to share this network adapter” checked. Otherwise, this should only be checked for the 3rd NIC used to managed Hyper-V. Create Virtual MachineCreate the virtual machine by the Actions menu or right click menu. New -> Virtual Machine… Next.  Give the virtual machine any name you choose. Choose the location of the virtual machine files. Ideally, this would be on a separate drive than the C drive like a SAN, NAS, or separate RAID volume. Next. 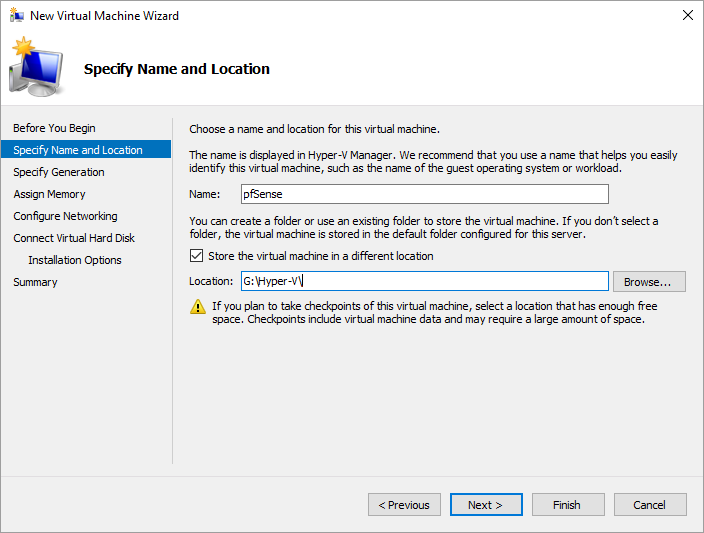 pfSense does not currently work with Generation 2. You must select Generation 1. Next. 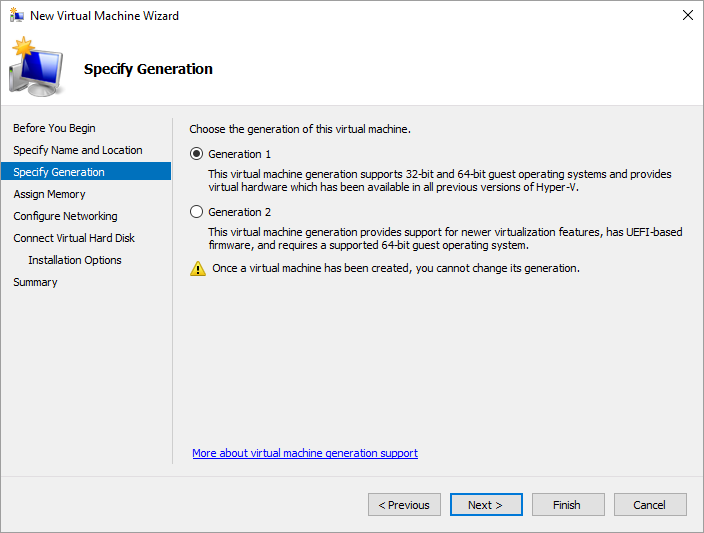 Assign the memory. This can be easily adjusted later on. It will depend on what plugins you decide to install and probably the amount of traffic that needs to go through the firewall. I will go with 4 GB (4096 MB) for my example. Next. 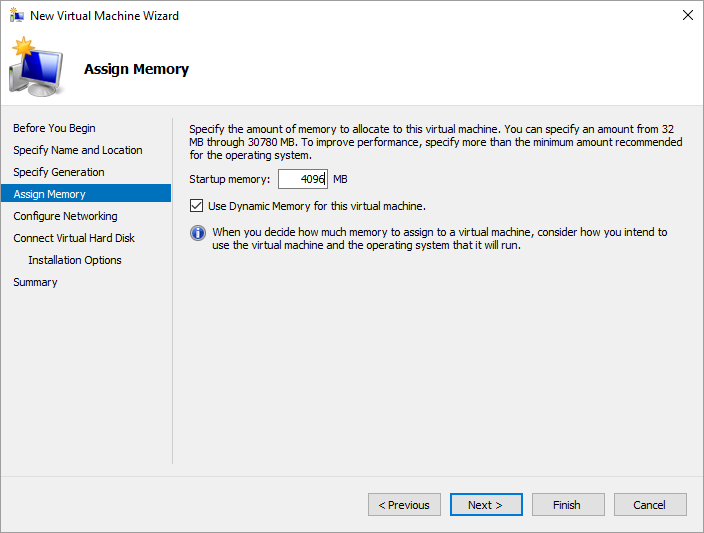 This is not as important as a step as we can only add one of the virtual switched in this window. Pick any one. I will choose the WAN. Next. 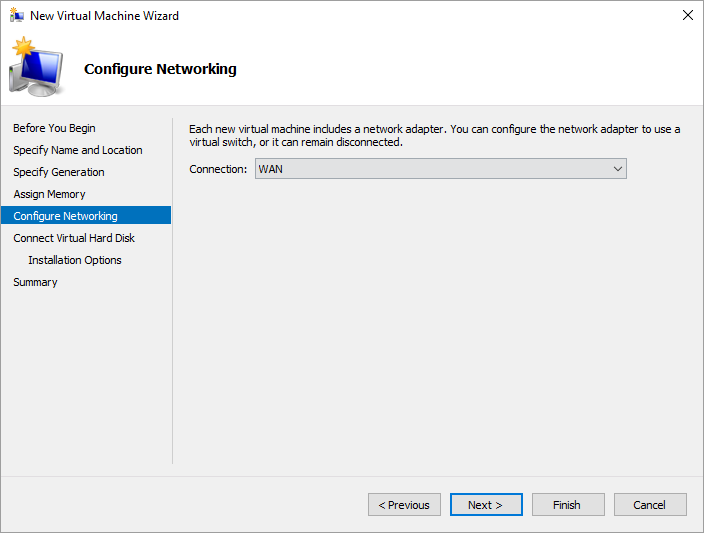 The amount of hard drive you will need will again depend on what plugins you will install plus the amount of logs you will store on your pfSense server. I am going to pick a small number of 32 GB for testing. That should be plenty. This can be increased later on. Next. 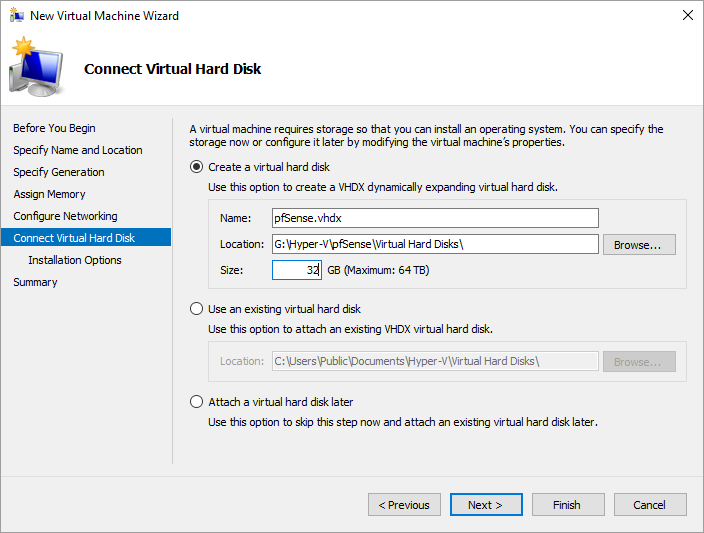 Select the ISO we downloaded earlier. Next. 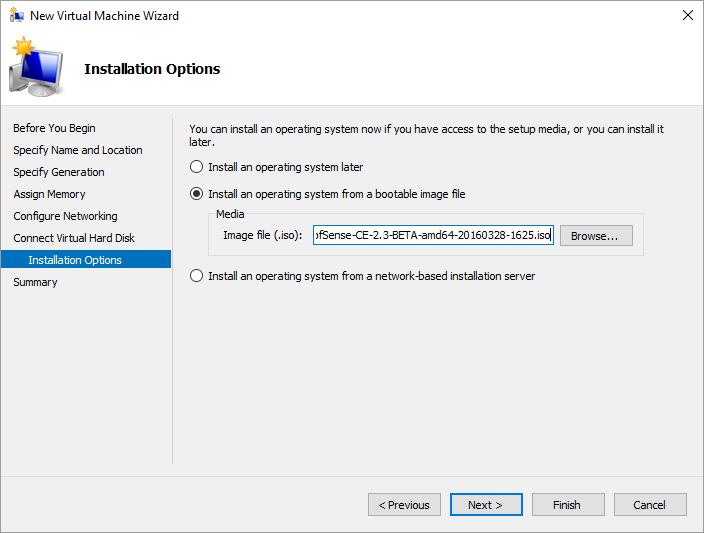 Confirm your setup. Finish. 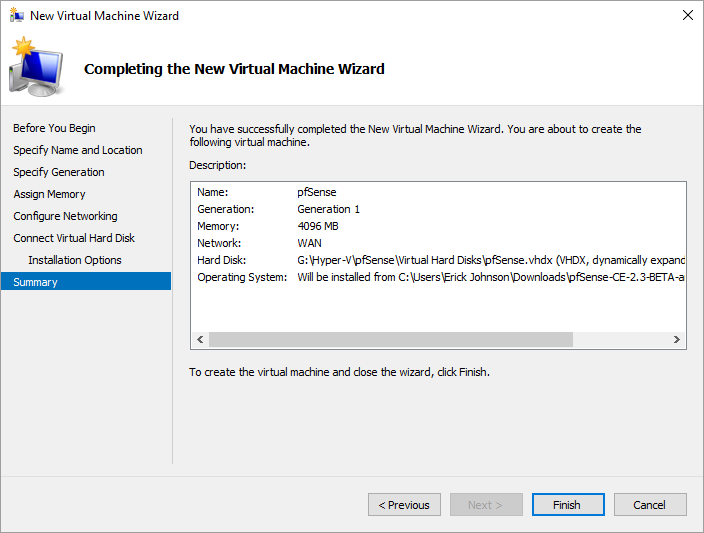 Your virtual machine has now been created and is currently in the off state. Now you need to add the second virtual switch to the virtual machine. Right click -> Settings -> Add Hardware -> Network Adapter -> Add Select the other switch from the drop down (LAN in my example). Click OK to save. 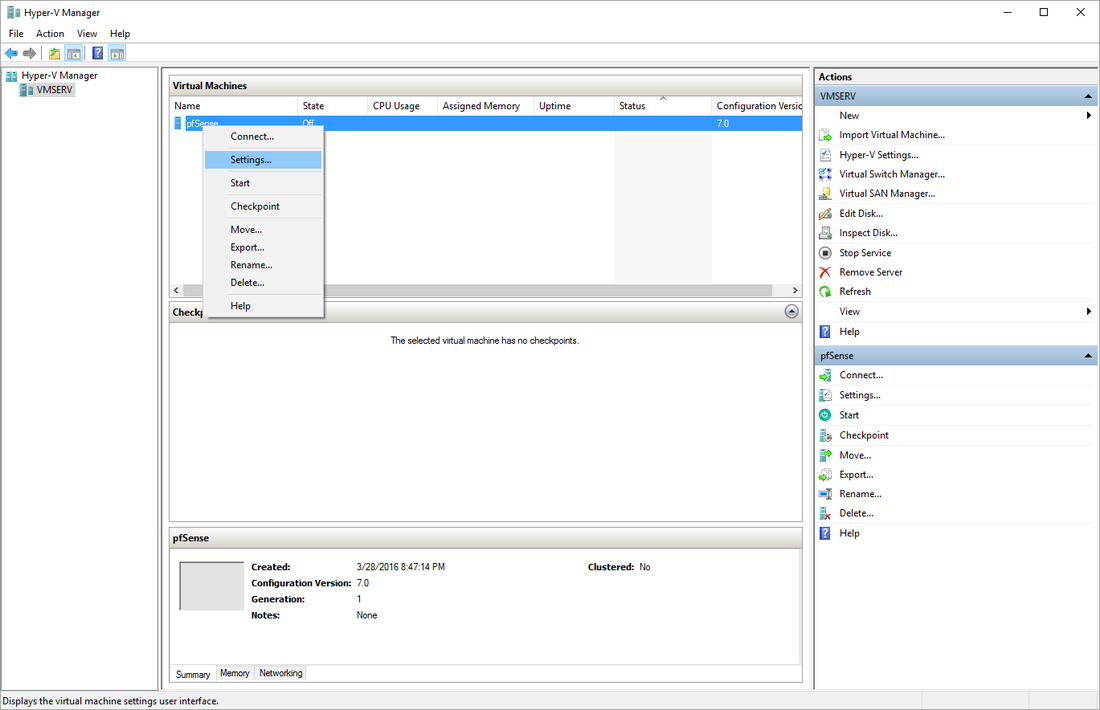   Additional SetupNow this will depend on how powerful a firewall you need but since I have the resources, I will go ahead and set the number of virtual processors to 2. More processors mean more data that can be processed at the same time which means less delay to the end user. That’s the idea at least. Note: Depending on how important your firewall is in relation to the other virtual machines you may be running on the same server, you may want to set the Virtual machine reserve to 100 so that pfSense has dedicated cpu resources to work with which again may mean less lag for the end user. 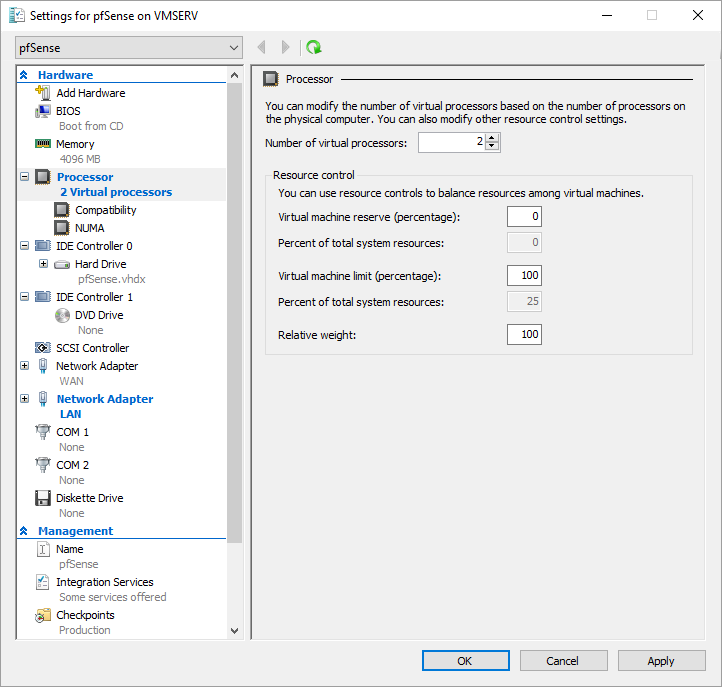 This concluded Part 1. Check out Part 2.
4 Comments
robert
6/6/2016 08:55:02 pm
I have been using pfSense on both Hyper-V and VMare for a few years now, but I wanted to see what your approach was. Note that while I was looking for your Part II, I clicked on the pfSense link, and it indicated part II, but when I clicked "read more" (or similar) it just looped back to Part I.
Erick
6/6/2016 10:56:03 pm
Hi there Robert! Thanks for checking out my site. I think the "read more" link is working like it should. It is supposed to just take you to the rest of the post. But I have also just added some links to get directly to Part 2 at the beginning and end. Let me know if you have any more issues and thanks for the feedback.
Murpcsm45
7/4/2017 06:41:37 am
When you say you connected a router are you referencing your computer with the two nics or a physical router and if so what router did you use? Hallo Eric, thank You for your very good Tutorial of pfSense. Please be so kind and tell me to my e-mail or on Ypour web sides, how is possible to install pfSense on Windows 10 Pro without creation Hyper-V? It could be interesting also for others people, I suppose. I have now new mini PC with internal Router Wan and 6 x LAN outputs dedicated for the pfSense, but I don´ t know how could I install and activate Internet connection WAN and LAN on the internal router of this Mini PC without virtual machine? Thank You very much for Your help in advance. With friendly regards from Czech Republic Waldorf Your comment will be posted after it is approved.
Leave a Reply. |
AuthorErick Johnson Archives
May 2024
Categories
All
|
 RSS Feed