Erick's Blog
  • Home
  • Blog
  • Apps
    • Mortgage Calculator
  • PowerShell
    • Blog & Examples
    • Excel Reference
  • Windchill
    • Document Exporter
    • Document Worker
    • E.P.L.E.S.
    • Export Released
    • Property Checker
    • Windchill Business Analytics >
      • Part 01 - Program Logic
      • Part 02 - Getting Data with SQL Queries
      • Part 03 - Automating SQL Queries
      • Part 04 - Converting SQL Results to XML
      • Part 05 - Data Processing and Manipulation
      • Part 06 - Displaying XML in HTML
      • Part 07 - Auto Updating Displayed Data
      • Part 08 - Hosting Webpage with an Existing Apache Installation
      • Part 09 - Running Multiple Queries In Sequence
      • Part 10 - Calculating Data Trends
      • Part 11 - Making It Modular
    • Windchill Quick View
  • Reviews
  • Music
  • Contact

Creo 4.0 and PowerShell - Part 3: Adding, Updating, and Designating Parameters

1/27/2017

3 Comments

 
Picture
I have seen many customers faced with this issue when they first start using Windchill.  They realize that they can search parameter values in Windchill and they either have never used them or they have but have not designated them.  Usually, they check everything into their new system and tell everyone to update parameters as they modify files.  We all know that will take forever and can be very stressful.

For Part 3, I am going to show you how to automate adding, updating, and designating parameters in your Creo files.  I promise it will be faster than your mapkeys.
Initial Conditions:

For this example, I am assuming you have not checked in any files into Windchill and you have all your files on a hard drive somewhere.  This will make things a little bit easier but we will get to automating this with existing files in Windchill in a later part.

I am also assuming you have clean data i.e. files open without popups or regeneration issues.  Error handling will also be dealt with in a later part.

Step 1: Creating the Attribute Mapping CSV

In order to automate this task, we need to know what files to look for and what attributes, attribute values, and attribute types to use for each file.  Let's start with creating a CSV of file names with this little script below.
Code Editor

    
Picture
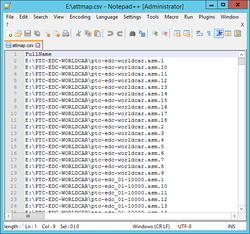
Filepath Export CSV Results
Initially, this looks great but there are issues here.
  1. You cannot explicitly open a Creo Versioned file with the Toolkit.  If I went to File -> Open in Creo, I would only see a single .prt, .asm, or .drw for each file.  The versioned files seem to disappear.  This is because Creo already knows to only open the latest version file in the directory.  I need to modify my script to remove the versioning from the end of each file.
  2. After I remove the versioning, I am still left with many duplicate rows.  This won't prevent the Toolkit from working but this is a huge performance problem as we will be telling Creo to open and modify the same file multiple times.  You can certainly row reduce in Excel but we can also do this with PowerShell to eliminate that step.
Both of these problems are solved with the altered PowerShell script below.

    
Picture
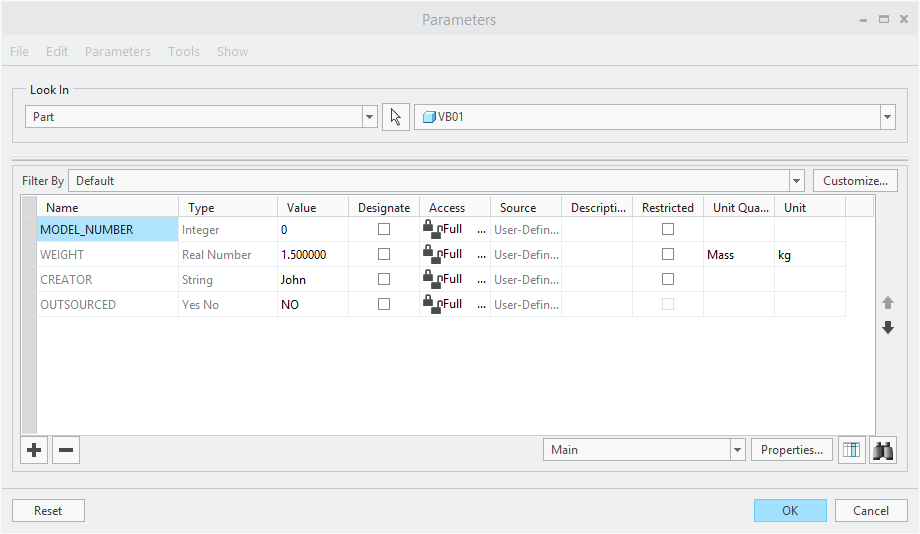
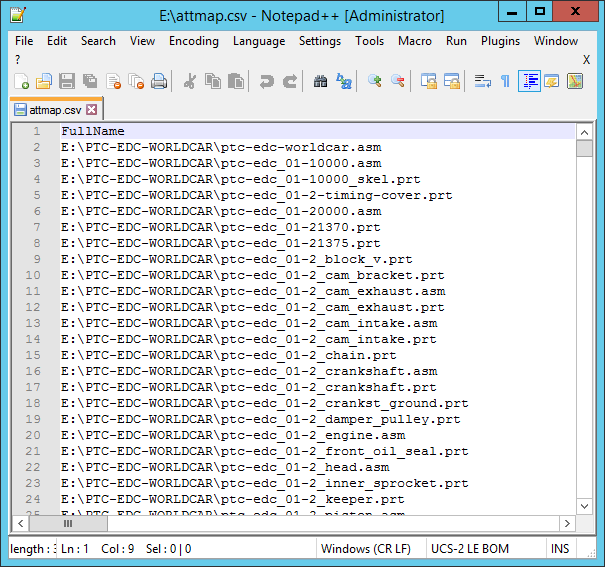
Filepath Export CSV Results - Unique Rows
Now we have only unique and unversioned files.

Step 2: Populating the Attribute Mapping CSV

Take the CSV file we created and open it with Excel.  Then add columns with parameters names, types, and values as in the below screenshot.  I have added one of each type for reference as well as simple dummy values.  Even though I have only added 4 attribute columns, the script I will show you has no limit to how many it can accept.
Picture
Attribute Mapping CSV - Populated

Step 3: Running the Parameter Automation Script

I have rearranged some variables from the original "Open Creo" script to work with the new loop I have created.  The script below will:
  1. Read CSV
  2. Open each file
  3. Check if attribute exists
  4. Update existing value if you set the override switch
  5. Add new parameters and populate values
  6. Designate parameters
For the PTC World Car sample files I am using, the script updates all 856 files in under 10 min.  Be sure to at least do a random sampling and verify the correct parameters and values were populated.  Again, this script is only meant to work with perfect data.  There is no error handling.  We will deal with errors in another post at a later time.
Parameter Automation Script

    
Picture
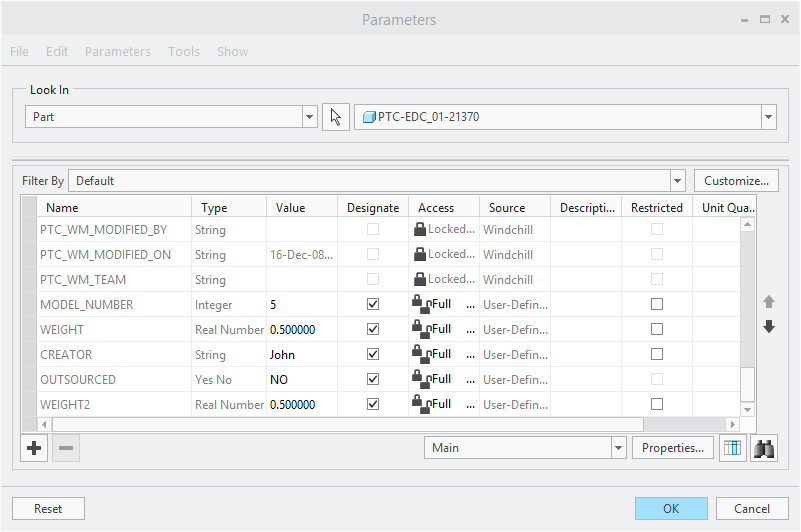
Newly Created Parameters
There you go!  You now have another way to impress your boss.  Tell them about how much money you just saved the company or use the extra time to slack off.  Your choice.
3 Comments
macaba
4/6/2017 01:46:16 am

What a legend Erick - this works perfectly, and im a Powershell noob too, thanks a million

Reply
Greg Montgomery link
12/28/2017 12:44:18 pm

Excellent. Using Powershell with the .NET API for Creo. Did not know that was a thing.

Reply
Serkan link
5/10/2018 06:09:58 am

great tutorial !!!
thanks a lot

Reply


Leave a Reply.

    Author

    PLM engineer while "on the clock", programmer, designer, dreamer all other times.

    Archives

    July 2017
    May 2017
    February 2017
    January 2017
    December 2016
    August 2016
    July 2016
    June 2016
    May 2016
    April 2016
    March 2016

    Categories

    All
    ASP.NET
    Batch Script
    C#
    Career
    Computers
    Creo
    Creo API
    Flash
    GameMaker
    GitHub
    Home Loan
    How To
    HTML5
    Java
    JavaScript
    MAME
    Mortgage
    Music
    .NET Core
    Office
    PC Games
    PfSense
    PowerShell
    Reviews
    Robot
    SQL
    Video Games
    Web App
    Windchill
    Windchill API

    RSS Feed

Copyright © 2018 Erick Johnson
  • Home
  • Blog
  • Apps
    • Mortgage Calculator
  • PowerShell
    • Blog & Examples
    • Excel Reference
  • Windchill
    • Document Exporter
    • Document Worker
    • E.P.L.E.S.
    • Export Released
    • Property Checker
    • Windchill Business Analytics >
      • Part 01 - Program Logic
      • Part 02 - Getting Data with SQL Queries
      • Part 03 - Automating SQL Queries
      • Part 04 - Converting SQL Results to XML
      • Part 05 - Data Processing and Manipulation
      • Part 06 - Displaying XML in HTML
      • Part 07 - Auto Updating Displayed Data
      • Part 08 - Hosting Webpage with an Existing Apache Installation
      • Part 09 - Running Multiple Queries In Sequence
      • Part 10 - Calculating Data Trends
      • Part 11 - Making It Modular
    • Windchill Quick View
  • Reviews
  • Music
  • Contact