ERICK'S BLOG
  • Home
  • Blog
  • Apps
    • Mortgage Calculator
  • Windchill
    • E.P.L.E.S.
    • Export Released
    • Document Exporter
    • Document Worker
    • Property Checker
    • Windchill Business Analytics >
      • Part 01 - Program Logic
      • Part 02 - Getting Data with SQL Queries
      • Part 03 - Automating SQL Queries
      • Part 04 - Converting SQL Results to XML
      • Part 05 - Data Processing and Manipulation
      • Part 06 - Displaying XML in HTML
      • Part 07 - Auto Updating Displayed Data
      • Part 08 - Hosting Webpage with an Existing Apache Installation
      • Part 09 - Running Multiple Queries In Sequence
      • Part 10 - Calculating Data Trends
      • Part 11 - Making It Modular
    • Windchill Quick View
  • PowerShell
    • Blog & Examples
    • Excel Reference
  • Music
  • Contact

Creo 4.0 and PowerShell - Part 1: Getting Started

1/20/2017

4 Comments

 
Picture
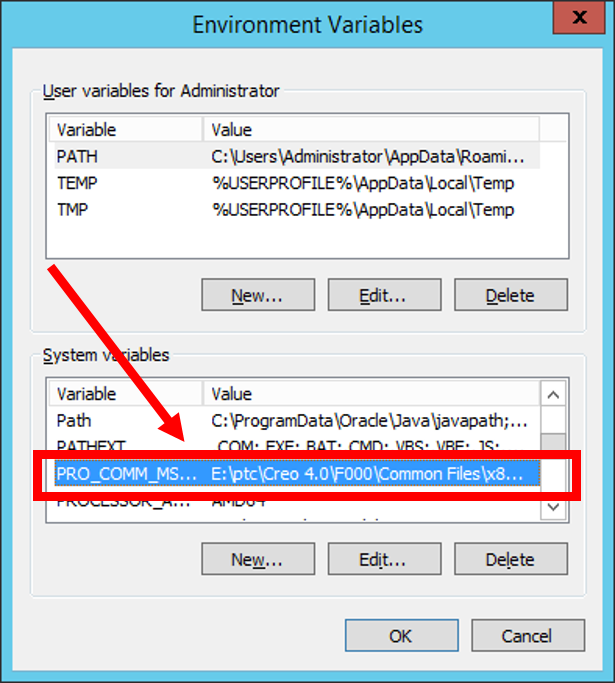
Welcome Creo users/hackers!

There doesn't seem to be much out there when it comes to using PowerShell with Creo.  I will shed some light on this topic and attempt to explain each line so that you can finally start automating Creo related tasks all on your own.
​
​Part 1 of a multi-part series deals with the basics.  You will learn how to install the appropriate toolkit, configure it to work, and do some basic tasks in Creo like opening a file.

Step 1: Installation

Now I can't tell you what license you need, if any, to use this because I have a special "everything and anything" license.  It is possible you only need one when you start selling an app and anyone is allowed to install and build apps for free.  Anyways, to install, you first download the Creo media and click on Customize.
Picture
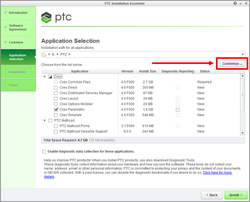
In the "Creo Parametric" section and under the "Application Features" tab, check the box next to "VB API for Creo Parametric" under the "API Toolkits Section".
Picture

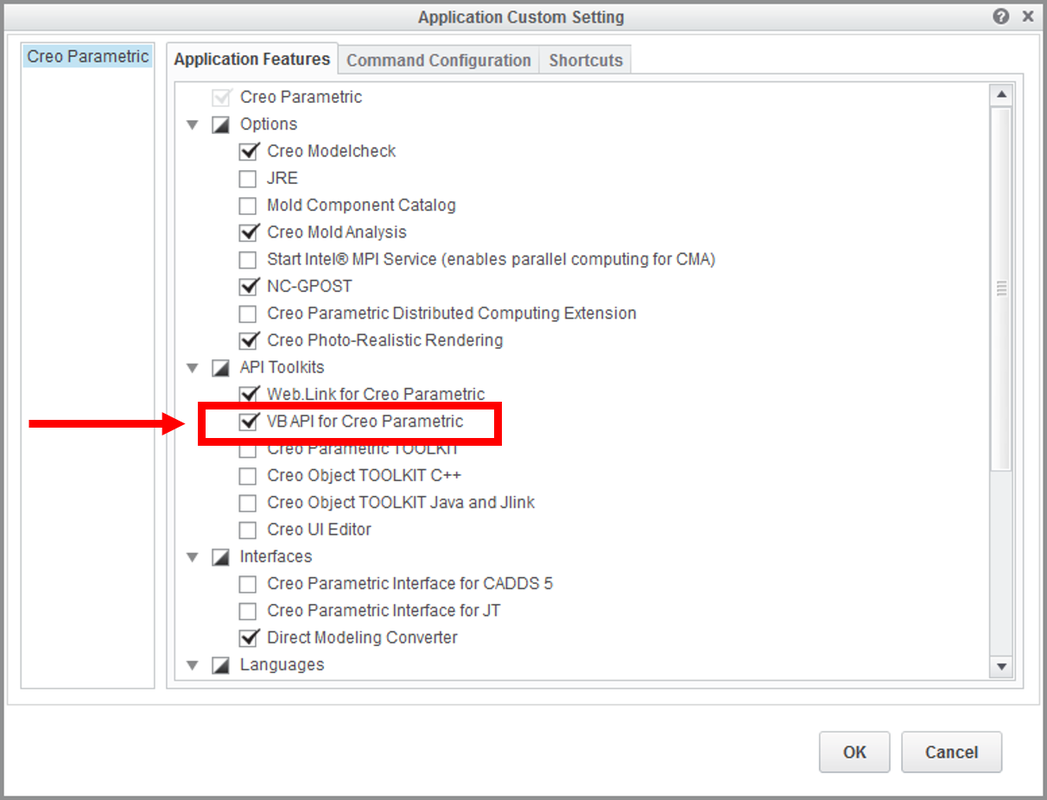
Step 2: Configuration

Once it is done installing.  Browse to <Creo Installation Directory>\<Datecode>\Parametric\bin and run the "​vb_api_register.bat" script as an Administrator.
Picture
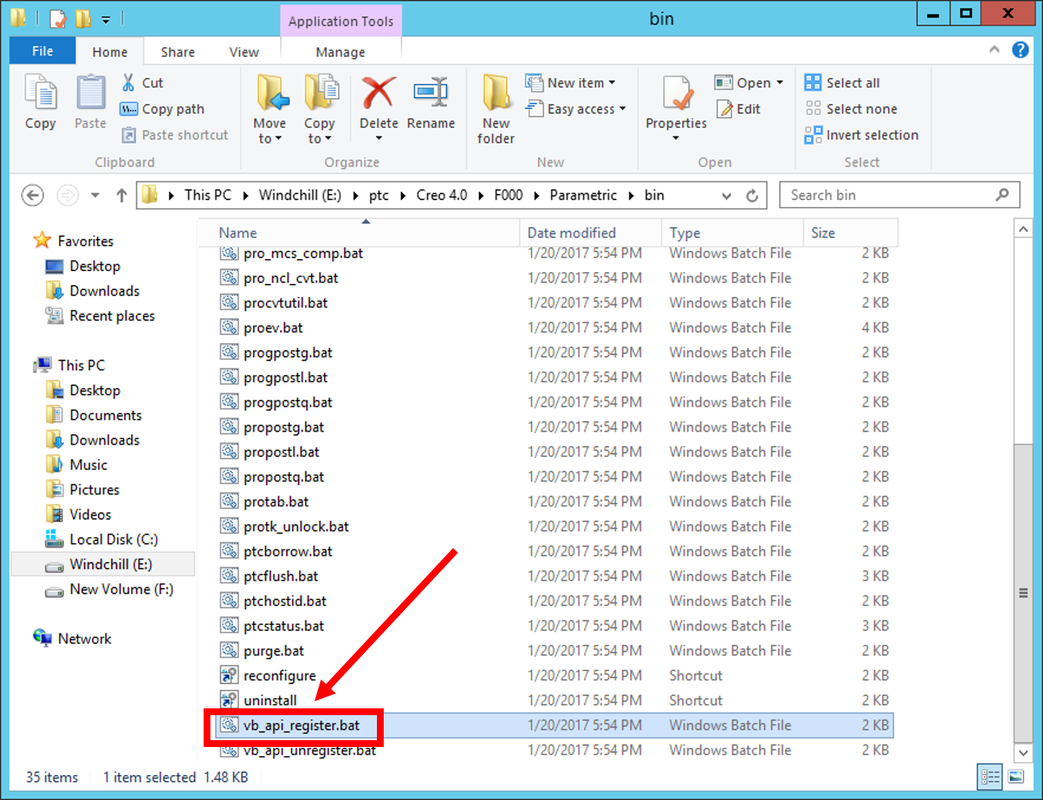
Next, you need to go to Control Panel\System and Security\System -> Advanced system settings -> Advanced -> Environment Variables... and add a new system variable:
  • Variable name: PRO_COMM_MSG_EXE
  • Variable value: <Creo Installation Directory>\<Datecode>\Common Files\x86e_win64\obj\pro_comm_msg.exe
Picture

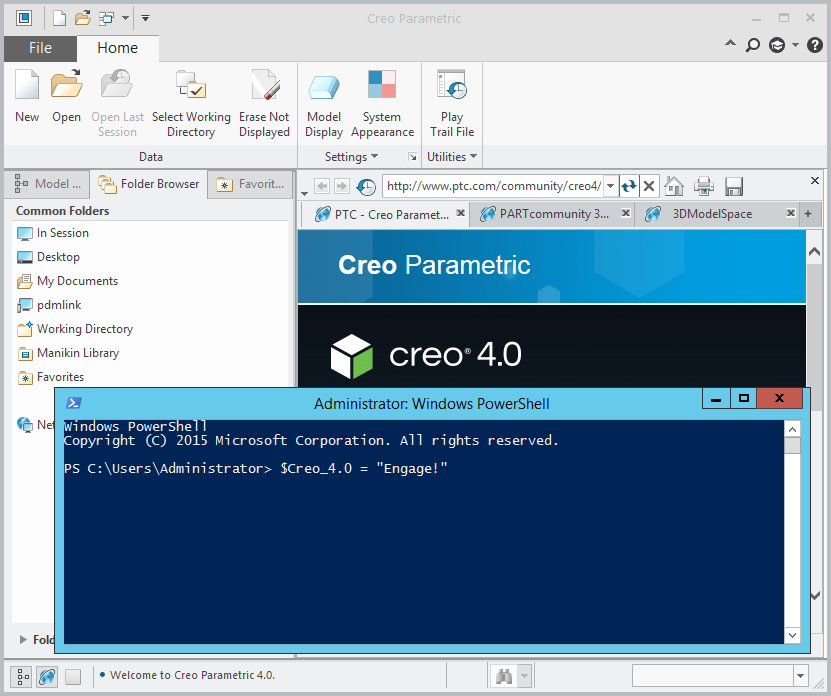
Step 3: Making Your First Script

Open a Windows PowerShell ISE Window.  I like the ISE because it gives a nice interface to write and save a script for later use.  I am going to get straight to the code and comments.


If you run the script with the last line "$connection.End()" commented out, you should get the below result with your given file.
Picture

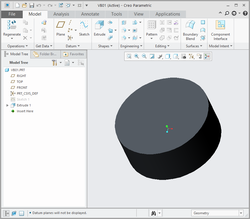
Now you know how to open and save files.  Part 2 will discuss exporting files to third party formats.
4 Comments
chougule link
4/14/2017 05:30:20 am

Dear sir
I am interested to learn Creo-VB API to automate design process for mech. parts
Kindly send the detail tutorials if any
thanking you

Reply
Lily link
6/1/2017 04:13:18 am

Thank you for sharing the process of Creo..Will be looking out for your next blogs ..

Reply
julika link
5/6/2019 02:14:35 am

best post for ever

Reply
Serdar
11/30/2019 01:03:44 am

Thank you for your sharing to us.

Reply

Your comment will be posted after it is approved.


Leave a Reply.

    Author

    Erick Johnson

    Archives

    May 2025
    May 2024
    July 2017
    May 2017
    February 2017
    January 2017
    December 2016
    August 2016
    July 2016
    June 2016
    May 2016
    April 2016
    March 2016

    Categories

    All
    ASP.NET
    Batch Script
    C#
    Career
    Computers
    Creo
    Creo API
    Flash
    GameMaker
    GitHub
    Home Loan
    How To
    HTML5
    Java
    JavaScript
    MAME
    Mortgage
    Music
    .NET Core
    Office
    PC Games
    PfSense
    PowerShell
    Reviews
    Robot
    SQL
    Video Games
    Web App
    Windchill
    Windchill API

    RSS Feed

Copyright © 2025 Erick Johnson
  • Home
  • Blog
  • Apps
    • Mortgage Calculator
  • Windchill
    • E.P.L.E.S.
    • Export Released
    • Document Exporter
    • Document Worker
    • Property Checker
    • Windchill Business Analytics >
      • Part 01 - Program Logic
      • Part 02 - Getting Data with SQL Queries
      • Part 03 - Automating SQL Queries
      • Part 04 - Converting SQL Results to XML
      • Part 05 - Data Processing and Manipulation
      • Part 06 - Displaying XML in HTML
      • Part 07 - Auto Updating Displayed Data
      • Part 08 - Hosting Webpage with an Existing Apache Installation
      • Part 09 - Running Multiple Queries In Sequence
      • Part 10 - Calculating Data Trends
      • Part 11 - Making It Modular
    • Windchill Quick View
  • PowerShell
    • Blog & Examples
    • Excel Reference
  • Music
  • Contact