|
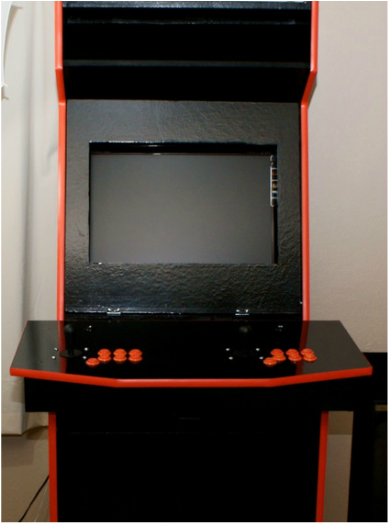
I always wanted to build my very own arcade cabinet. Having never created anything without Legos, K'nex, or popsicle sticks, I was thrilled to finally build a "real" functional object. It was the fall of 2008, I searched all over the internet for appropriate building plans that closely resembled what I had in mind. After finding some (I forget who made them), I began to plan. The first things I needed were tools, I didn't have any. I had to buy a drill, router, saws, squares, rulers, etc. That was the easy part as I know I wanted to get quality tools that would last me for many years. The difficult part was figuring out how to get the MDF board home. It obviously wouldn't fit in my car and I didn't want to cut the large pieces into pieces which would give the sides ugly seams and also leave me with a less stable frame. I had to wait, two months I think, for my dad to visit me in college with his truck. It was a long 2 months. I went to Home Depot who have always been helpful with projects. They did the major cuts for me for free! I didn't need to by/use a circular saw after that. (Too bad I won't be getting any Ad money for the name drop/review.) The most fun part about making the cabinet was drawing all the cutting/drilling lines. My habitual need to make things symmetrical led to a few drilling mistakes which you can see in the photos. Nothing that an Engineer and wood glue couldn't solve! I used a vinyl stick for the control panel. I figured it was better than getting paint smeared on your hands and it was cheaper than overlaying the top with acrylic like most cabinets do to protect the stickers. Some spur of the moment changes I made to the original plans was to add cabinetry to the inside space. I also made the keyboard pullout drawer door fold flat so you would have a more ergonomic experience whenever you needed to use the keyboard. The controls were all linked together (by WAY too thick wire) to a J-PAC controller to simulate the keystrokes in the program. (Another missed revenue stream there *sigh*). I also drilled a hole in the back to allow cables to cleanly exit the case. The front bezel was custom fit to a monitor I had on hand for the project. The only part I regret not doing is the top sign. Unfortunately, those things just cost too much money for a college students project but you never know. Now that we have LED strips in the world, I may add my own sign eventually. Enjoy the pictures of the progress below!
1 Comment
|
AuthorErick Johnson Archives
May 2024
Categories
All
|

 RSS Feed